Mr. BROWNIE

Mr. BROWNIE
Mr. BROWNIE é simplesmente irresistível ! Arte e Imagens : www.arvorealta.com

Saturday, August 20, 2011

CHOCOLATE MOUSSE ;-)

Chocolate Mousse
Chocolate Mousse

Chocolate mousse is a great dessert for entertaining because 1) it looks pretty, 2) everyone gets their own serving, and 3) you can make it a day ahead of time. In fact, you do need to make it at least several hours ahead of time. I decided to prepare chocolate mousse using the darkest chocolate I could find (Trader Joe's has some Belgian 70% cocoa 1 lb bricks). Chocolate mousse is a little bit tricky. If you incorporate the egg yolks when the chocolate is too warm, it will cook, if too cold, it will seize up when the other ingredients are added. If you stir and not fold the egg whites and whipped cream in, your mousse will not be fluffy, but dense.

Almost all recipes I reviewed called for bittersweet chocolate. From what I can tell, bittersweet has a bit more sugar and a bit less cocoa than the 70% dark chocolate I used. If you are going to serve the mousse straight - with no added cream or fruit, and you love the taste of barely sweet dark chocolate, your mousse will be perfect with the 70%. If you layer in fruit (raspberries complement the chocolate quite well) and or more whipped cream, you'll want either to add sugar or use bittersweet chocolate to begin with.

Print Options

Chocolate Mousse Recipe

Ingredients

  • 4 1/2 ounces bittersweet chocolate, finely chopped
  • 2 tablespoons (1 ounce) unsalted butter, diced
  • 2 tablespoons espresso or very strong coffee (I used decaf espresso from a local Starbucks)
  • 1 cup cold heavy cream
  • 3 large eggs, separated
  • 1 tablespoon sugar

(Optional) Raspberries and extra whipped cream

Method

1 Whip the cream to soft peaks, then refrigerate.

2 Combine the chocolate, butter, and espresso in the top of a double boiler over hot, but not simmering, water, stirring frequently until smooth. Remove from the heat and let cool until the chocolate is just slightly warmer than body temperature. To test, dab some chocolate on your bottom lip. It should feel warm. If it is too cool, the mixture will seize when the other ingredients are added.

3 Once the melted chocolate has cooled slightly, whip the egg whites in a medium bowl until they are foamy and beginning to hold a shape. Sprinkle in the sugar and beat until soft peaks form.

4 When the chocolate has reached the proper temperature, stir in the yolks. Gently stir in about one-third of the whipped cream. Fold in half the whites just until incorporated, then fold in the remaining whites, and finally the remaining whipped cream.

5 Spoon or pipe the mousse into a serving bowl or individual dishes. If you wish, layer in fresh raspberries and whipped cream. Refrigerate for at least 8 hours. (The mousse can be refrigerated for up to a day.)

Serves 5-8, depending on the size of the servings.

SOURCE: http://simplyrecipes.com/recipes/chocolate_mousse/

BLACK COFFEE CHOCOLATE CAKE


Black Coffee Chocolate Cake


Kathy228's Note:

This is the EASIEST dark chocolate cake yet.

It is super-chocolaty and very moist. I've been using this recipe for 30-years.

NOTE: Here's a substitute for the one cup buttermilk: 2/3 cup plain yogurt plus 1/3 cup milk.


Ingredients:

Directions:

  1. 1
    Beat it all together in one big bowl.
  2. 2
    The batter will be very thin.
  3. 3
    Pour into a greased and floured 13 x 9 inch pan or two 9-inch layer pans.
  4. 4
    Bake 350°F for 35-40 minutes.
  5. 5
    * This is great when filled with creamy peanut butter and frosted with dark chocolate frosting.

Read more: http://www.food.com/recipe/black-coffee-chocolate-cake-9490#ixzz1VaEahjRH

Total Time:45 mins

Prep Time: 5 mins

Cook Time: 40 mins

SOURCE: http://www.food.com/recipe/black-coffee-chocolate-cake-9490


ULTIMATE CHOCOLATE CAKE

Ultimate chocolate cake

Ultimate chocolate cake

Indulge yourself with Angela Nilsen's heavenly moist and fudgy chocolate cake - perfect for celebrations - birthdays, weddings, christenings - any excuse!

Difficulty and servings

Easy

Cuts into 14 slices

Preparation and cooking times

Preparation time

Prep 30 - 40 mins

Cook time

Cook 1 hr - 1 hr 30 mins

Plus baking and cooling time
Freezable

Without icing

Ingredients

  • 200g good quality dark chocolate , about 60% cocoa solids
  • 200g butter , cut in pieces
  • 1 tbsp instant coffee granules
  • 85g self-raising flour
  • 85g plain flour
  • 1⁄4 tsp bicarbonate of soda
  • 200g light muscovado sugar
  • 200g golden caster sugar
  • 25g cocoa powder
  • 3 medium eggs
  • 75ml buttermilk (5 tbsp)
  • grated chocolate or curls, to decorate

FOR THE GANACHE

  • 200g good-quality dark chocolate , as above
  • 284ml carton double cream (pouring type)
  • 2 tbsp golden caster sugar


Method

  1. Butter a 20cm round cake tin (7.5cm deep) and line the base. Preheat the oven to fan 140C/conventional 160C/ gas 3. Break the chocolate in pieces into a medium, heavy-based pan. Tip in the butter, then mix the coffee granules into 125ml/4fl oz cold water and pour into the pan. Warm through over a low heat just until everything is melted - don't overheat. Or melt in the microwave on Medium for about 5 minutes, stirring half way through.
  2. While the chocolate is melting, mix the two flours, bicarbonate of soda, sugars and cocoa in a big bowl, mixing with your hands to get rid of any lumps. Beat the eggs in a bowl and stir in the buttermilk.
  3. Now pour the melted chocolate mixture and the egg mixture into the flour mixture, stirring just until everything is well blended and you have a smooth, quite runny consistency. Pour this into the tin and bake for 1 hour 25- 1 hour 30 minutes - if you push a skewer in the centre it should come out clean and the top should feel firm (don't worry if it cracks a bit). Leave to cool in the tin (don't worry if it dips slightly), then turn out onto a wire rack to cool completely.
  4. When the cake is cold, cut it horizontally into three. Make the ganache: chop the chocolate into small pieces and tip into a bowl. Pour the cream into a pan, add the sugar, and heat until it is about to boil. Take off the heat and pour it over the chocolate. Stir until the chocolate has melted and the mixture is smooth.
  5. Sandwich the layers together with just a little of the ganache. Pour the rest over the cake letting it fall down the sides and smoothing to cover with a palette knife. Decorate with grated chocolate or a pile of chocolate curls. The cake keeps moist and gooey for 3-4 days.
Try

Not quite what you're looking for?

Try our other top-rated chocolate cake recipes including Chocolate brownie cake Chocolate marble cake, or Chocolate birthday cake.

541 kcalories, protein 6g, carbohydrate 55g, fat 35 g, saturated fat 20g, fibre 2g, sugar 40g, salt 0,51 g

Recipe from Good Food magazine, April 2004.

SOURCE: http://www.bbcgoodfood.com/recipes/3092/ultimate-chocolate-cake


Yammy... Chocolate Coffee Cake...Wanna try?

Posted on Friday, 18th February 2011 by Grace

This week has been an especially difficult week and I wanted to bake something extra special. I thought I was entitled to indulge a little and I decided to make Yeasted Chocolate Coffee Cake.

A photo of a loaf of Yeasted Chocolate Coffee Cake with a Crumb Topping.

When I think of comfort food, chocolate, homemade bread and cake are on the top of my list. Plus the aroma of homemade yeast bread baking in the oven is intoxicating and always brings me back to a happy place. Wonderful memories from my childhood always come rushing back.

Unfortunately homemade bread and happy memories wasn’t going to “cure what ailed me” (really bad week) but adding a little chocolate (Chocolate makes you happy, right? Plus dark chocolate in moderation is good for you) could do the trick!

A photo of a loaf of freshly baked Chocolate Coffee Cake with a Crumb Topping.

Baking also helps me to relax. I turn on the music (a little Springsteen always makes me happy) and I focus all my attention to the task at hand and even if it’s only for a little while I am able to push my worries aside. It’s amazing how a clear head can make you look at things differently and help you to remember all the many blessings in your life.

As I am writing and sharing with you today, I realize I could’ve probably baked anything. I needed a little “me” time to clear the cobwebs and it helped me to put things into perspective.

A photo of Chocolate Coffee Cake, the perfect breakfast cake.

It’s just an added bonus that I chose to combine three of my favourite comfort foods and bake this amazing Yeasted Chocolate Coffee Cake.

A photo of a loaf of Chocolate Cake Coffee.

I’ll leave you with this thought, a steaming hot mug of freshly brewed coffee, a slice of warm, freshly baked, Yeasted Chocolate Coffee Cake and “The River” blaring in the background, this will definitely “cure what ails you!”

Yeasted Chocolate Coffee Cake

(From Martha Stewart Living, March 2011 Edition)

  • Coffee Cake
  • Filling
  • Crumb Topping

A photo of a loaf of Chocolate Coffee Cake just removed from the loaf pan.

Makes 1 – 5-inch X 10-inch (12.7-cm X 25.4-cm) cake

For Coffee Cake

  • 2¼ teaspoons (one ¼-ounce or one 8 gram envelope) active dry yeast
  • ¼ cup plus 2 tablespoons (total 85 g) plus a pinch of granulated sugar
  • ¾ cup (6 ounces) warm milk, 110° F (43° C)
  • 1 large egg plus 1 large egg yolk
  • 3 cups (375 grams) plain (all-purpose) flour
  • ½ teaspoon kosher salt
  • 1 stick (113.4 grams) unsalted butter, room temperature, plus more for bowl, pan and non-stick baking paper
  • 1 large egg, lightly beaten with 1 tablespoon heavy cream (35%), for egg wash
  1. In a medium-sized bowl, sprinkle the yeast and a pinch of granulated sugar over the warm milk. Let stand until foamy, about 5 minutes.
  2. Whisk together the remaining ¼ cup plus 2 tablespoons (85 g) granulated sugar, the whole egg and the egg yolk. Whisk into yeast mixture.
  3. In the bowl of an electric stand mixer, combine the flour and salt. Add the egg mixture and beat on low speed until almost fully incorporated, about 30 seconds.
  4. Switch to the dough hook attachment. Add the butter and beat until smooth, soft, and slightly sticky, about 10 minutes.
  5. Butter a large bowl.
  6. Lightly flour a clean work surface. Turn out dough onto floured surface; knead a few times until smooth. Place in the buttered bowl, turn to coat, and cover with plastic wrap. Let stand in a warm place until doubled in volume, 1 to 1½ hours.

For Filling

  • 8 ounces (200 g or 1¼ cups) bittersweet chocolate, coarsely chopped
  • ½ cup (112.5 g) granulated sugar
  • 2 teaspoons ground cinnamon
  • 4 tablespoons (57 g) unsalted butter, room temperature, cut into small pieces
  1. In a small-sized bowl, combine the chocolate, granulated sugar, and cinnamon.
  2. Cut in butter with a pastry cutter or rub in with your fingers until combined.
  3. Punch down dough. Transfer to a clean, lightly floured work surface. Let stand for 5 minutes.
  4. Roll out the dough to an 18-inch (46-cm) square (about 1/8-inch thick or .32-cm thick).
  5. Brush the edges of the dough square with egg wash. Spread filling over dough, reserving ½ cup (4 ounces) and leaving a 1-inch (2.54-cm) border.
  6. Tightly roll dough like a jellyroll. Pinch seam to seal, and fold in half to bring ends together to form a U. Twist two or three times to “braid”.
  7. Butter a 5-by-10-inch (12.7-by-25.4-cm) loaf pan. Line with non-stick baking paper, leaving 1-inch (2.54-cm) overhangs and then butter non-stick baking paper.
  8. Transfer dough to loaf pan and brush top with egg wash.

For Crumb Topping

  • ¼ cup plus 2 tablespoons (total 47 g) confectioners’ sugar, sifted
  • ¼ cup (31.25 g) plain (all-purpose) flour, sifted
  • 3 tablespoons unsalted butter, room temperature
  1. In a small-sized bowl, combine the confectioners’ sugar, flour, and butter.
  2. Sprinkle crumb topping and reserved ½-cup (4 ounces) filling over cake.
  3. Preheat oven to 350° F (180° C). Drape plastic wrap over dough. Let stand in a warm place until raised by half, 20 to 30 minutes.
  4. Remove plastic wrap, and bake, rotating loaf pan halfway through baking, until golden, about 55 minutes.
  5. Transfer loaf pan to a wire rack. Let cake cool.
  6. Remove cake from loaf pan.
  7. Enjoy!
SOURCE: http://gracessweetlife.com/2011/02/yeasted-chocolate-coffee-cake/

CHOCOLATE ESPRESSO BUNDT CAKE =))


Chocolate Espresso Bundt Cake with Dark Chocolate Cinnamon Glaze

Well, the birds are chirping, the sun is shining, and Easter is just days away, so I really don’t have a reasonable explanation as to why I would feel the need to create such a dark and intense dessert followed by moody and borderline-ominous photos. The thing is, that just seems to be my frame of mind these days: well, not moody and ominous, but dark, rich, and chocolate-loving. In this case, my inspiration for the flavours of the cake came solely from a jar of dark chocolate covered espresso beans (the ones in the photos) that I bought a few weeks ago because, well, as you may have guessed if you follow my tweets on twitter, that I am often yearning for good coffee, chocolate, and caffeine in general. Sure, some may call that an addiction, but I prefer to call it a deep and passionate love affair. The style and photo inspiration came from a gorgeous blog I found a few months back through Pinterest, from this photo here, taken by John Cullen. The photo and cake are from designer Nikole Herriott‘s blog, who happens to be a local talent. She, among many other wonderful things, creates the most stunning and unique wooden pedestal plates. You can see them here. Let’s pray I can someday be the proud owner of one!

So, as any self-respecting chocolate and coffee addict would do, I decided to go ahead and try a chocolate espresso bundt cake and top it with a dark chocolate cinnamon glaze. If you happened to catch my recent post about the Vanilla Bean Bundt Cake with Vanilla Bean Glaze, you’ll remember that I am quite taken with bundt cake pans, even though my collection was pretty sad at a whopping 1 pan. Since then, I’ve added 2 more bundt pans to my collection, and couldn’t wait another day to get bundting. In this case, it’s actually an official Kugelhopf pan, which I really love, but the final cake took on a slightly less intricate shape, simply because the batter didn’t fill up the entire pan. I really didn’t mind, since it appears a bit more simple.

The cake itself is a rich, deep dark, chocolate cake kept moist with butter and sour cream. The method of warming the butter and cocoa on the stove first, then whisking in the remaining ingredients, was a first for me, but I feel it was a success, and it was kind of a welcomed change. I decided to add some cinnamon to the dark chocolate glaze because I love the combination of espresso and cinnamon; it’s reminiscent of my beloved triple-lattes sprinkled with cinnamon, but it also adds a neat, almost Mexican, dimension to the cake. I should add, though, that the flavour of the espresso powder and cinnamon in the glaze is subtle, and really just boosts and enhances the amazing flavour of the dark chocolate, both in the cake and glaze. That’s also why I feel it’s really important to use the best quality chocolate you can. I made this cake a few days ago, and just tried it today for the first time (once I finally had the chance to photograph it!). I was really surprised at how amazingly moist it was, and the flavours really came together nicely, I imagine even more so than day 1. I suppose that’s one of the many wonderful things about bundt cakes, and one of the reasons why they are quickly becoming a favourite on my love-to-bake list.

From a photography perspective, you may have noticed that, up until now, I tend to love taking bright, white backgrounds, and uber-happy baked-good photographs. Well, that certainly hasn’t changed, but I’ve secretly always been absolutely smitten with dark, moody food photographs, however, as I discovered today, they definitely require a mental shifting of gears. Perhaps it’s mainly because I have never attempted it before, and because I’m pretty new to food photography, but it was tricky at first. In the end, I found it most effective to underexpose the photos a bit and to avoid too much incoming window-light. I’m not sure if that’s how the pros would do it, but it’s what I found worked for me to achieve the look I was going for. I also found that boosting the photos in Photoshop (I always start with The Pioneer Woman’s “Boost” action), really helped to bring the depth to the photo. Speaking of the pros, I have some serious professional food-photographer crushes these days, such as John Cullen, Tina Rupp, Jim Norton (who actually shot some of my work recently!), and Katie Quinn Davies–they have all mastered this type of photography, among others, which is why I consider each of their portfolios the ultimate food-photography inspiration. I was lucky enough to have an array of Grant’s grandmother’s (Nanny) vintage silver cake and sweet serving dishes complete with the perfect patina for the dramatic vibe I was going for. Love when that happens! This photo above makes me think of a ghostly tea party, of sorts. Now that I think about it, perhaps the vibe of this photo shoot is a side-effect of the hauntingly beautiful Black Swan we watched late last night by candlelight and the pattering sound of rain outside.

I hope you’re having a not so dark-and-ominous weekend, but that you enjoy this cake (most definitely not a dark-and-ominous experience.).

Love, Rosie xo

Here’s the recipe:

Chocolate Espresso Bundt Cake with Dark Chocolate Cinnamon Glaze {click here for printable recipe}

Chocolate Espresso Bundt Cake

Ingredients

8 oz butter (2 sticks/1 cup)

1/2 cup high quality Dutch process cocoa, such as Cacao Barry Cocoa Powder – Extra Dark

1 tablespoon instant espresso powder dissolved into 3/4 cup water

2 cups granulated sugar

1 cup sour cream

1 tablespoon vanilla extract

2 large eggs

2 cups all-purpose flour

1 teaspoon baking soda

1/2 teaspoon salt

Method

Preheat oven to 350° F. Butter and flour a 10-12 cup bundt pan or Kugelhopf pan.

Melt butter in a large saucepan over medium-low heat; add cocoa, stirring until smooth. Whisk in the espresso water and remove from heat. Add the sugar, sour cream, vanilla, and eggs to the warmed cocoa mixture and whisk until smooth. In a medium bowl combine the flour, baking soda, and salt. Add all at once to the first mixture, whisking until well blended.

Pour batter into prepared pan. Bake for 40-45 minutes, or until it feels firm to the touch and has slightly pulled away from the sides of the pan. Cool in pan on a rack for 20 minutes. Carefully loosen the cake with a knife and invert onto a large plate.

*Bundt cake recipe adapted from Chocolate Bundt Cake from About.com.

Dark Chocolate Cinnamon Glaze

Ingredients

4 oz high quality bittersweet chocolate (I use Callebaut Chocolate – Pure – Bittersweet – 1 kg), coarsely chopped

1/3 cup unsalted butter, softened and cut into 1/2 pieces

1 1/2 teaspooons light corn syrup

1/2 teaspoon ground cinnamon

Method

Place the chocolate, butter, corn syrup, and cinnamon in a medium heatproof bowl over a pot of simmering water. Stir the mixture using a rubber spatula until melted and smooth.

Assembly

Pour warm glaze over bundt cake. Keep covered in a cake-keeper at room temperature for up to 4 days.

*Glaze recipe adapted from Baked Explorations.

Good luck & enjoy!

Love, Rosie xo

*Product Notes: You can purchase the Nordicware Bundt Cake pan I used here: Nordicware Kugelhopf Bundt Pan

You can purchase the incredible Cacao Barry Extra Brute Cocoa Powder (my all-time favourite) here: Cacao Barry Cocoa Powder – Extra Dark


SOURCE: http://sweetapolita.com/2011/04/chocolate-espresso-bundt-cake-with-dark-chocolate-cinnamon-glaze/


Sunday, July 31, 2011

Chocolate Soup for Two !! Sounds lovely !


Valentine's day is exactly one month away and I'm elbow deep in chocolate recipes. I've been searching for ideas and inspiration for sweet, edible tokens of affection. Recently while watching a food show on TV, I saw chocolate soup being served at a popular chocolate bar/buffet. Patrons were proclaiming their love (between slurps of soup) for the warm, velvety smoothness and rich chocolaty flavor. I got out a pen and paper and wrote:


In my search I've found so many variations on chocolate soup, I didn't know which one to try! They all sounded so rich and almost too heavy. (Does anyone really want a heavy dessert on date night?) After a few trial runs, I decided to make my own.

RECIPE:
Soup :
- A cup of skim milk
- A cup of fat free half and half
1/3 cup fat free sweetened condensed milk
- 1 teaspoon of vanilla extract
- A cup of bittersweet chocolate chips OR 6 oz. bar chocolate chopped.
- 2 tbsp cornstarch
- 2 tbsp cold water Garnish
- 2 oz. low fat cream cheese
- 2 heaping tbsp marshmallow cream

Soup:
In a medium saucepan, over medium heat, stir together the
skim, half and half , sweetened condensed milk and vanilla extract.
Bring the mixture altmos to a boil.
Put the pan on low heat, add the chocolate and whisk, until the
chocolate start to melt.
Combine the cornstarch and water to a form a slurry.
Add a slurry a little at a time, whisking constantly, until the soup is thik
and smooth.
You will know it is ready when the bubbles are gone and the
chocolate has thikened, about 5 to 7 minutes.
Carefully pour into two bowls and garnish.

Topping
Microwave the creamcheese at 10 sec. intervals
or until it can be stirred smooth. Add marshmallow cream
to the cream cheese and mix welll.
Dollop on top of the soup, or transfer mixture to pastry
bag and pipe design.


I wanted to lighten the soup without compromising the richness or velvety texture. I mixed skim milk with fat-free half and half to maintain the creamy texture. I also found that I could not tell the difference (in the completed soup) between the fat-free and regular sweetened condensed milk. One of my favorite elements of this dish is the marshmallow & cream cheese garnish. It provides an interesting and needed flavor contrast.


I used Ghiradelli semisweet baking chips, but the variations on this recipe are as numerous as there are varieties of chocolate. I would imagine an orange infused chocolate bar would pair well with a little Grand Marnier in this soup. I also think a big fat biscotti crouton (or many of them) would be a delicious addition.


This dessert should be served warm. I have a jar of gourmet ice cream topping called "chocolate crunch" that I used for further garnishing. Completed, the soup is rich and velvety just like the full-fat version. The flavor is a bit like a rich chocolate pudding. If I could describe where chocolate soup lives, it's somewhere between rich hot chocolate-ville and chocolate pudding city.


I think this would be an excellent Valentine's day dessert to share with someone special, even if that someone special is your Grandma. I view the holiday as a celebration of all kinds of love, and not just the romantic variety. I'm hoping to share more chocolaty recipes with you before V-day arrives, and I can't wait to see what everyone else will be cooking up!

Fonte/source: http://www.sprinklebakes.com/2010/01/chocolate-soup-for-two.html


RED WINE CHOCOLATE TRUFFLE


When I began working on these I had something else in mind altogether. I wanted a simple red wine ganache that could be chilled, balled, frozen, and rolled in cocoa powder. I even found a recipe (on a blog that shall remain nameless) that laid claim to this possibility. Sounds simple right?
Well, it wasn't simple. Not with the recipes I had, and with the information I had collected.

Ganache recipes are quick to put together, so this afforded me enough time to try out a few recipes and variations. One thing seemed certain time and time again. This ganache would have to be molded. The more red wine added, the more flavorful the ganache became and unfortunately, the more loose it became.

I'm not going to lie, tempering sounds a little above my aptitude. I'm not a Chocolatier, so for now I'll be using dark chocolate meltable candy wafers. They make a pretty truffle, and they don't take away from the main attraction: The Ganache. I didn't use a standard candy mold either, I used the Wilton mini hearts silicone pan and it worked beautifully!


When preparing to make these, you'll want to put together the ganache first. (Scroll down for printable recipe.) I think a dry red wine imparts the best flavor. A Chianti would work very well.


You'll need 2 to 3-1 lb. bags of dark chocolate meltable candy wafers. Melt them in batches as you need them. I found that I used about 1/2 bag at a time. You'll need a clean (preferably new) small craft brush with sturdy bristles.


Fill the molds about 1/4 of the way up with melted chocolate, and begin brushing the chocolate up the sides of the molds, coating the mold completely. When finished, put the mold in the freezer for about two minutes. After taking it out, check for thin spots in the hardened chocolate by holding the candy mold up to a light source. Paint on more chocolate until the chocolate cups are no longer transparent. Return to freezer. Repeat these steps until chocolate is completely opaque. (I think mine took about 3 times.)


Fill chocolate painted molds with the red wine ganache. DO NOT fill completely to the top. Transfer to the freezer for a couple of minutes. Remove, and top ganache with additional melted chocolate candy to enclose. Be sure it comes to the top of the mold and makes a flat surface. You want your truffle to seal properly and have an even surface to rest on when unmolded. Return to the freezer until set. Gently unmold truffles by pressing from the bottom of the mold upwards. Embellish as desired.


My truffles have a little lustre dust applied with a damp soft-bristled brush. I think it makes them look extra special. I also decided to button them up with a little bit of red melted candy coating (applied with disposable pastry bag). I think these turned out beautiful and best of all...


...rich and delicious!

Here's the (very easy) recipe for the red wine ganache, if you'd like to make them too!


This ganache sets up better than any I've tried, and gives a mild boozy aftertaste. I didn't include this tidbit in the recipe, but you can add up to 1/4 cup of red wine in place of the 5 Tbsp. The ganache will be loose, and you have to be VERY careful when sealing your truffles or you'll have a big leaky truffle mess. The version I've posted seemed to seal the best and still retain the red wine flavor. I think my next experiment will be adding a red wine reduction to a basic chocolate ganache.


Rainy days make the best baking and candy making days, but I'd really like some sunshine! I think Biscuit would too. The weather has been so dreary and unfortunately the forecast includes possible snow flurries tomorrow! So, I'm predicting a 100% chance of baking with accumulation of cookies and an increased chance of a little Pug being underfoot.


He doesn't go outside in inclement weather. (Spoiled!)

Fonte/source: http://www.sprinklebakes.com/2010/01/red-wine-chocolate-truffles.html

Tuesday, July 19, 2011

PIECE, LOVE & CHOCOLATE

Piece, Love & Chocolate

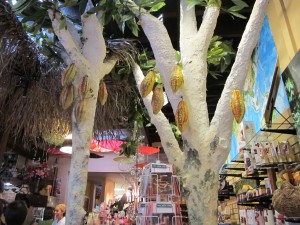
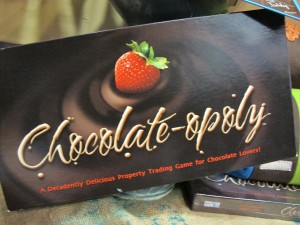
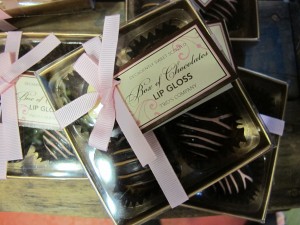
Enter Piece, Love, and Chocolate, in Boulder, Colorado, and you feel like you are walking into a scene from the movie, Chocolat, only better. This is no ordinary chocolate shop. It’s a magical chocolate boutique with more chocolate than you can imagine, both edible and fanciful.

IMG 2907 300x225 Piece, Love & Chocolate
Sarah Amorese (aka Madame Chocolat) owns and operates this chocolate boutique. Sarah’s mission is to enchant and entertain you and I was, indeed, enchanted. So enchanted, that I found an excuse to return the very next day—just in case there was something I missed.

Chef Sarah is a professional chocolatier and pastry chef. She creates all of the house-made recipes based on experience, trends, art, and the science of chocolate. There is always something to sample and savor.

IMG 2883 300x225 Piece, Love & Chocolate
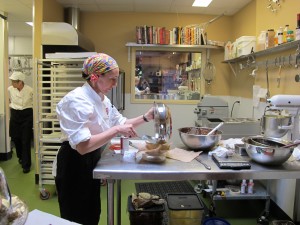
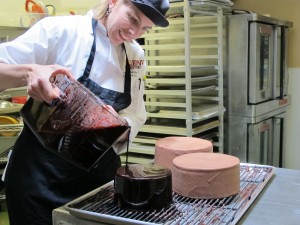
Genevieve Fetherston (aka Cocoa Coordinator) manages the kitchen and schedules the production of house-made chocolate goodies. Chef Genny tickled my chocolate lovin’ palate with chocolate yummies as I sat in rapt attention watching her create a Salted Caramel Truffle Torte.

IMG 2943 300x225 Piece, Love & Chocolate

IMG 2871 300x225 Piece, Love & Chocolate
Heidi Lewis (aka Gift Guru) purchases merchandise and manages the chocolate boutique. Heidi has an uncanny knack for procuring unique and beautiful gift offerings.

IMG 2902 300x225 Piece, Love & Chocolate

IMG 2914 300x225 Piece, Love & Chocolate
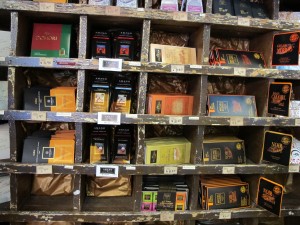
In addition to their own special confections, Piece, Love and Chocolate showcases the crème de la crème of chocolatiers. They proudly offer an extensive and eclectic array of fine chocolates from around the world. I sampled more than I can count.

IMG 2903 300x225 Piece, Love & Chocolate
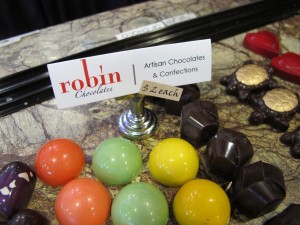
In honor of Father’s Day, and because my dad lives for lemon, I started with a lemon souffle truffle from Robin Chocolates of Longmont, Colorado. If truffles could sing, this one would be an aria.

IMG 2963 300x225 Piece, Love & Chocolate
But I didn’t stop there. . .

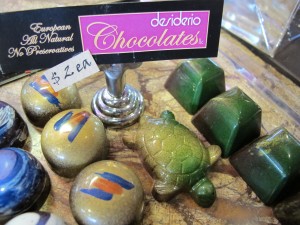
The Masala Turtle from Desiderio was to live for: Venezuelian chocolate, organic pistachio, cardamon, clove, pepper—and those were just some of the flavors I detected in that tasty little turtle. Vanessa, of Desiderio, has some beautiful vegan chocolates as well.

IMG 2966 300x225 Piece, Love & Chocolate

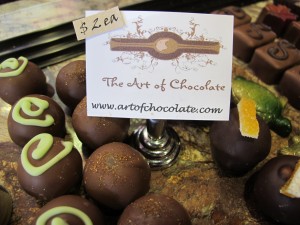
I sampled a Sweet Heat by The Art of Chocolate—organic Ceylon Cinnamon plus their very own organic spice mix in a milk chocolate ganache. Divine.

IMG 2967 300x225 Piece, Love & Chocolate
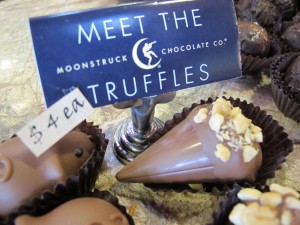
The mice are from Moonstruck Chocolatier, almost too cute to eat, but I had to sample one. I was, indeed, moonstruck. Be sure to check out their website for the summer sweet ‘n’ tart collection.

IMG 2971 300x225 Piece, Love & Chocolate
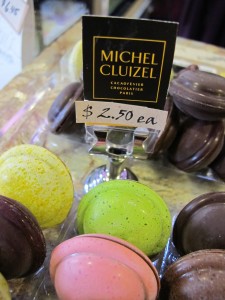
And finally, the orangette (orange rind stick) from Michel Cluzel—a burst of flavor that lingers long after the candy leaves your teeth. (literally)

IMG 2972 225x300 Piece, Love & Chocolate
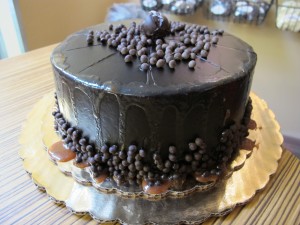
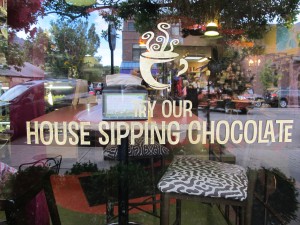
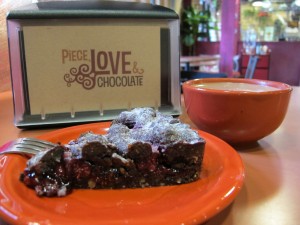
And, because I follow directions, I couldn’t leave without sampling the sipping chocolate and a decadent dessert from the display case: the RaspBeverly Tart, a flourless chocolate cake like no other. I dream about that cake.

IMG 2897 300x225 Piece, Love & Chocolate
IMG 2905 300x225 Piece, Love & Chocolate
—one of the many reasons Piece Love and Chocolate will be my top chocolate destination spot in the country, maybe even the world!

Do you have a favorite chocolate boutique to share?

FONTE : http://www.chocolateforbreakfast.com/piece-love-chocolate/